4 Ideas for the kids (or the whole family!) to get creative, inventive, playful AND be kind to the earth by keeping things out of the local landfill. Think twice before you toss that empty container!
Idea #1: Cereal Box Maze
Make your own cereal box maze with these basic materials:
- Large cereal box with 1 side cut out (Best done by parents!)
- 4 Straws cut into small sections
- School glue
- A small ball, marble, or round bead
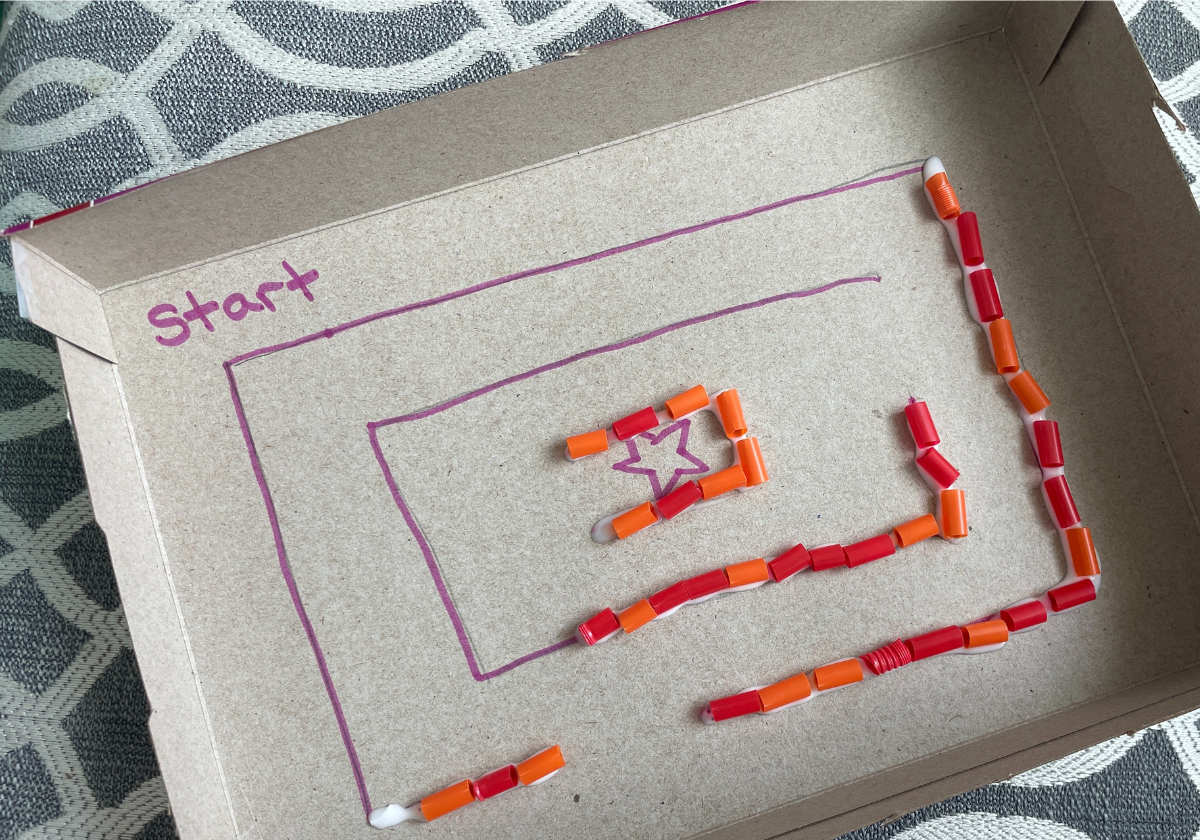
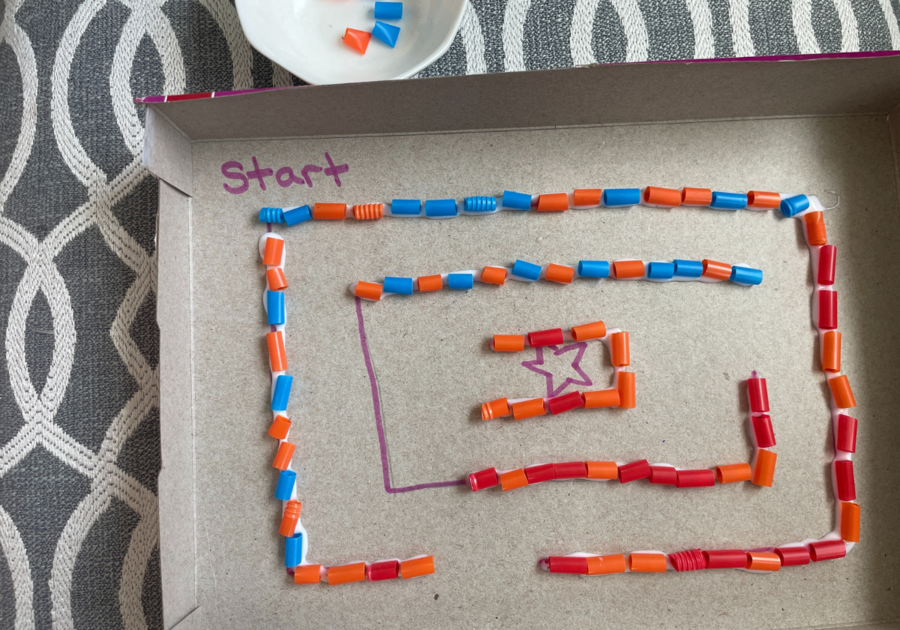
After cutting off the top and then taping down the loose flaps, draw in the maze pattern. Make sure the passages are wide enough for your ball to roll through! Put a line of glue down on the maze pattern and stick the little straw sections into it. Try not to make the glue line too thin or the straws won’t do a good job of sticking and staying in place.
In the photos you can see how it’s done more or less. One section of the line is left without glue and straws just to let you see how it all started off with just lines drawn in as the guide. In the example, the ball will start in the corner and then the objective will be to get it to where the center star is.
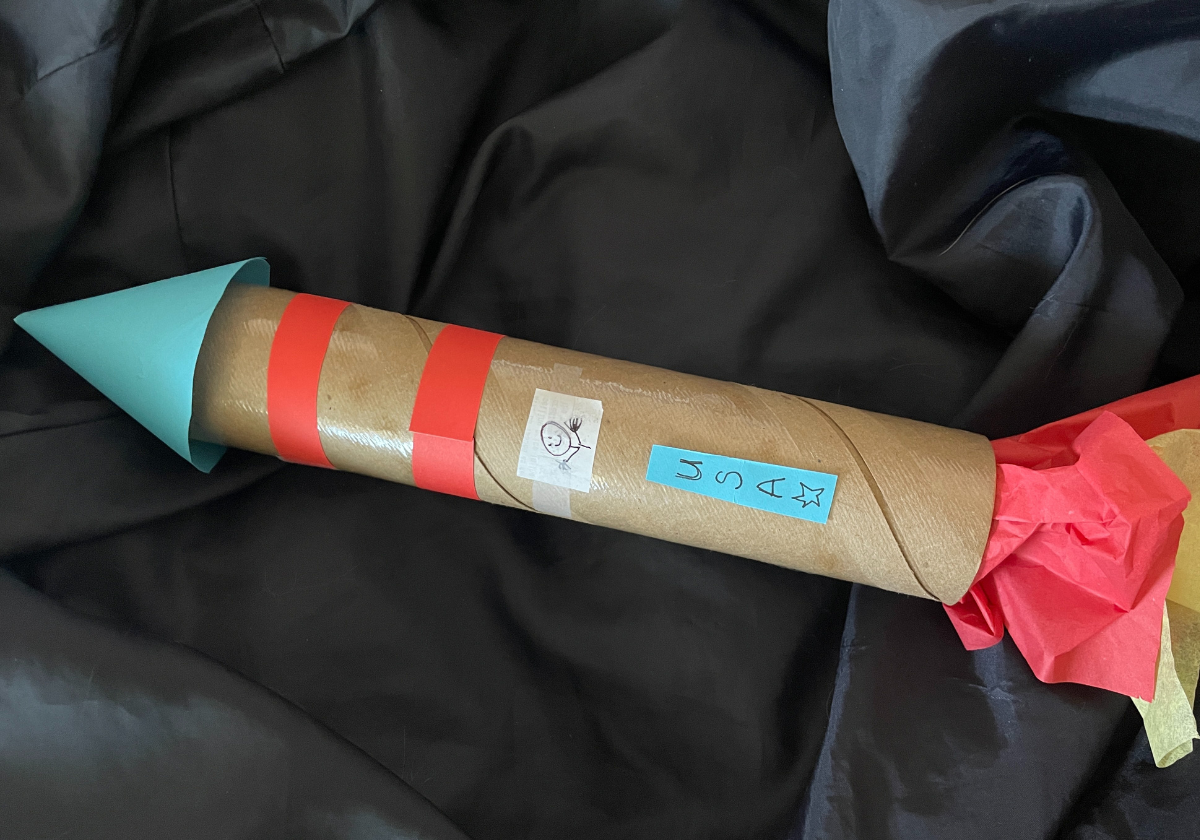
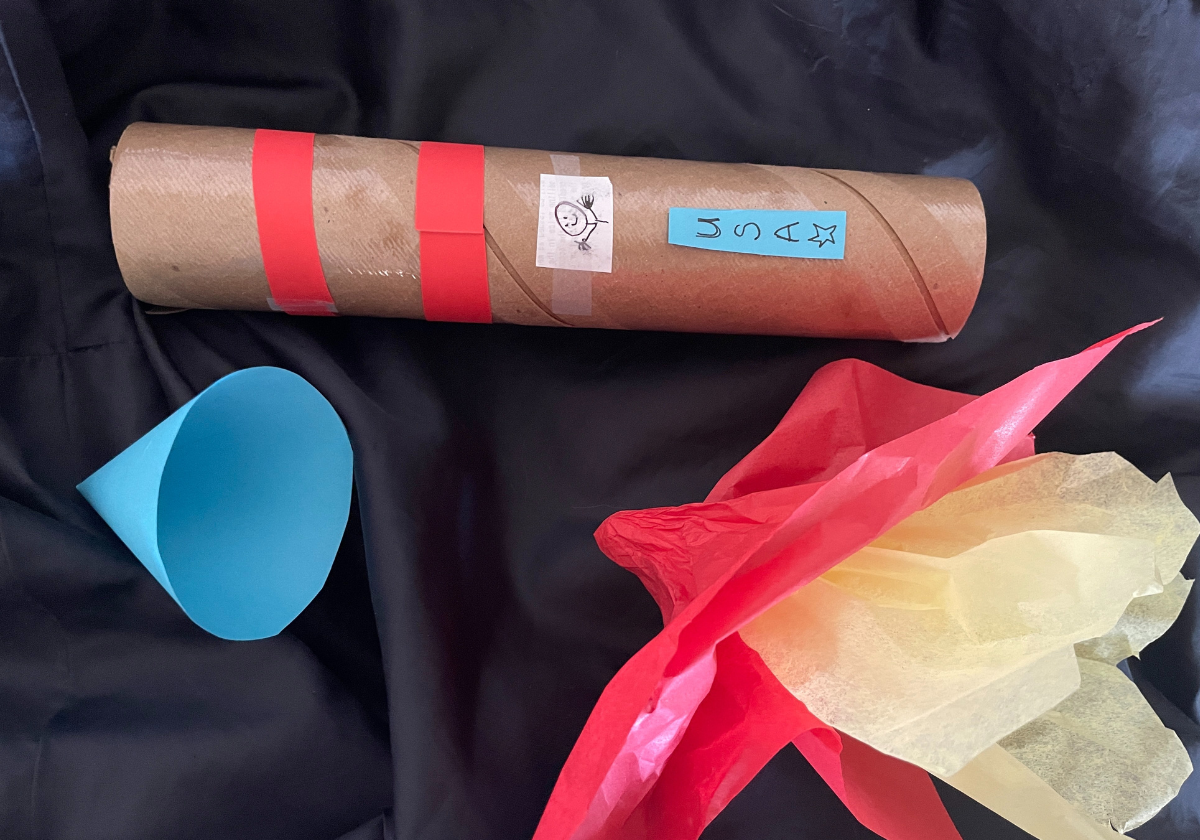
Idea #2: Paper Towel Roll Rocket Ship
This classic toy comes together easily and is fun to personalize. To make one you will need:
- Tube from the inside of paper towels (or toilet paper if you want a smaller rocket)
- Paper in a couple of different colors
- Tape and glue
- Gift bag tissue paper
Let your child have some fun decorating the body of the rocket using whatever papers or stickers you have. It’s not pictured but little sections of aluminum foil make great decorations or can even be used to cover the whole thing making it look like it’s made of metal!
 Get the tissue paper and stuff it in the bottom of the tube so it looks like flames. It can be taped in if that helps the tissue stay in place.
The last step is to make the tip of the rocket. Make a cone shape out of paper and tape it so it holds its shape. Put glue all around the top edge of the cardboard tube and then stick the cone on. Once the glue has dried the rocket is ready for takeoff!
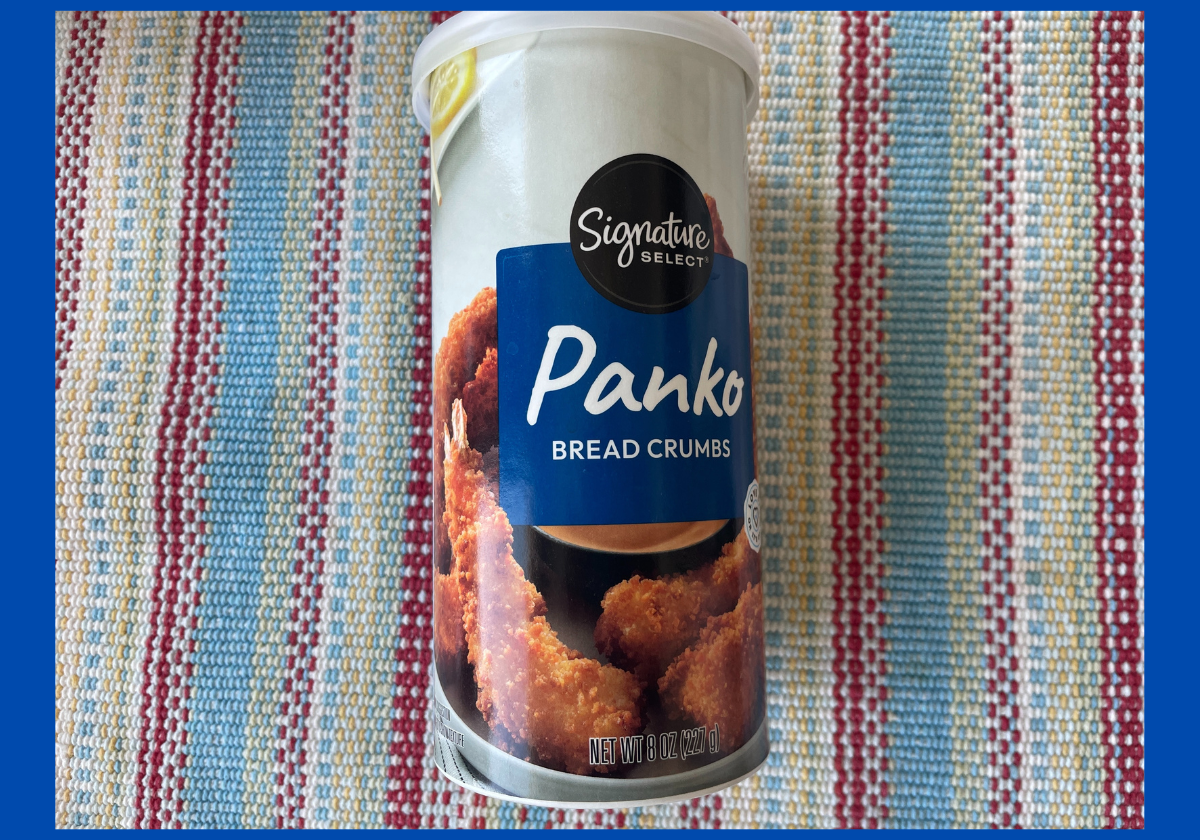
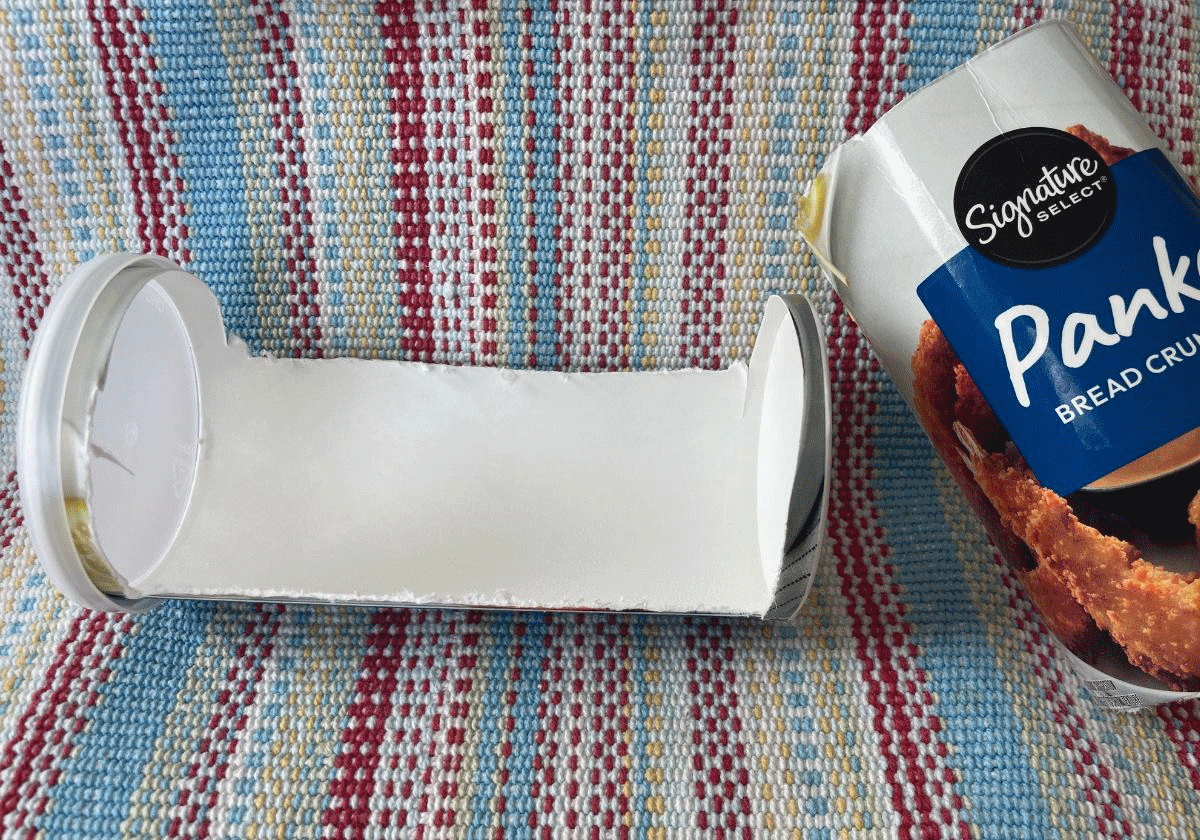
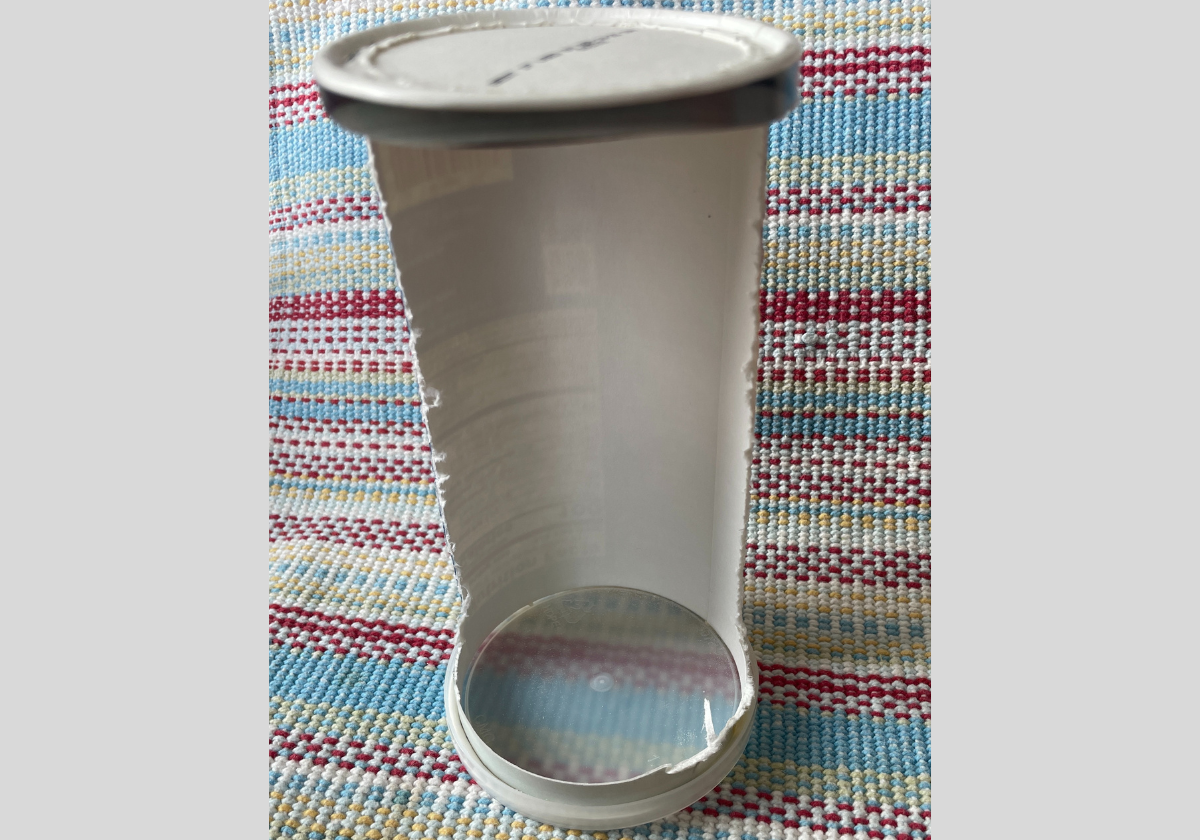
Idea #3: Cradle or Teleporter
For this project you start with a cardboard cylindrical container (think oatmeal container, salt container, or bread crumb container) cut a section out, and voila! A toy appears! The first step is for parents to cut out the middle section as pictured. Once that’s done, it can be turned into an old fashioned cradle or a futuristic teleporter depending on your child’s preference.
For a cradle, lay the container on it's side so it can rock a little one to sleep. Using baby or girl themed gift wrapping paper cut and attached sections with tape or glue so it stops looking like a food container. Maybe there’s a shirt in the closet that is stained or outgrown and that can be cut up to make a cute little blanket set for the cradle? Then add some gift wrapping ribbon, fake flowers, glitter or whatever you have at your disposal to make it look special. Done!
To make a teleporter, choose paint, paper or aluminum foil to decorate the container. Standing it on the lid end makes it more stable. Glue on features like a small square dental floss dispenser, some washers or small bolts or … so there are ways to “work” the teleporter. If you really want to go for it there are glow in the dark stickers and craft paints that would be fun to incorporate into the design!
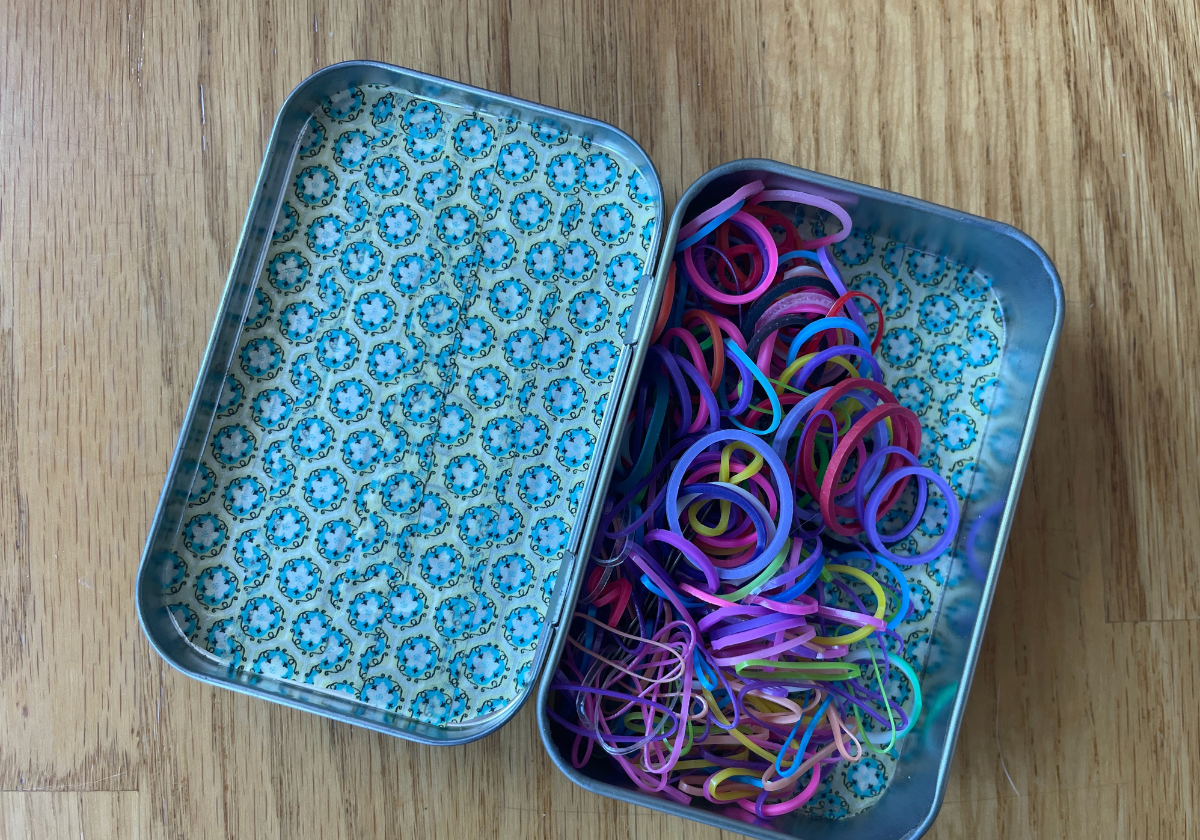
Idea #4: Mint Tin Treasure Box
When you have enjoyed all the mints in the tin, don’t toss it, pass it over to your child! The box pictured is used to hold hair rubber bands but they are great for holding any of the small treasures that children often collect.
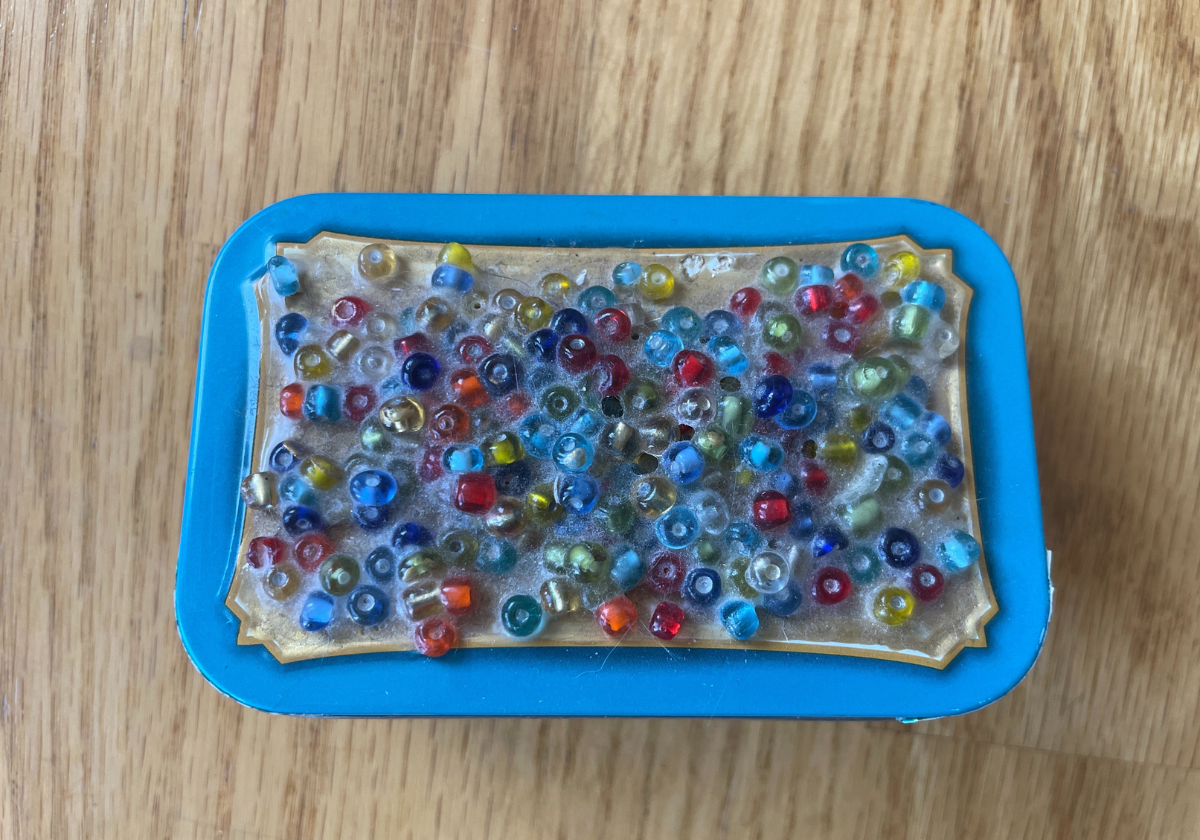
In terms of supplies, this project is pretty flexible and is a nice way to use up leftover from other projects. The example was made with washi tape, seed beads, glue and felt (there’s a piece glued onto the bottom so it won’t scratch surfaces). There are probably little odds and ends at your house that would be great to use to make a custom little treasure box. It could be as simple as paper or an object such as a tiny toy, some shells, or extra lego blocks. Glue the decorations on in a way so the brand name on the cover is no longer visible. Don’t forget to decorate the inside too with some little bits of paper or fabric!